Regardless of whether you use Presenter on Windows or Mac, we have provided helpful documentation below on setting up the extended display for each operating system.
Configure Extended Display for Windows
First, open the Windows Display settings by clicking on Start > Settings > System > Display. Alternatively, right-click on your desktop and click Display Settings.
Within the Display box, be sure the display option is set to Extend these displays.
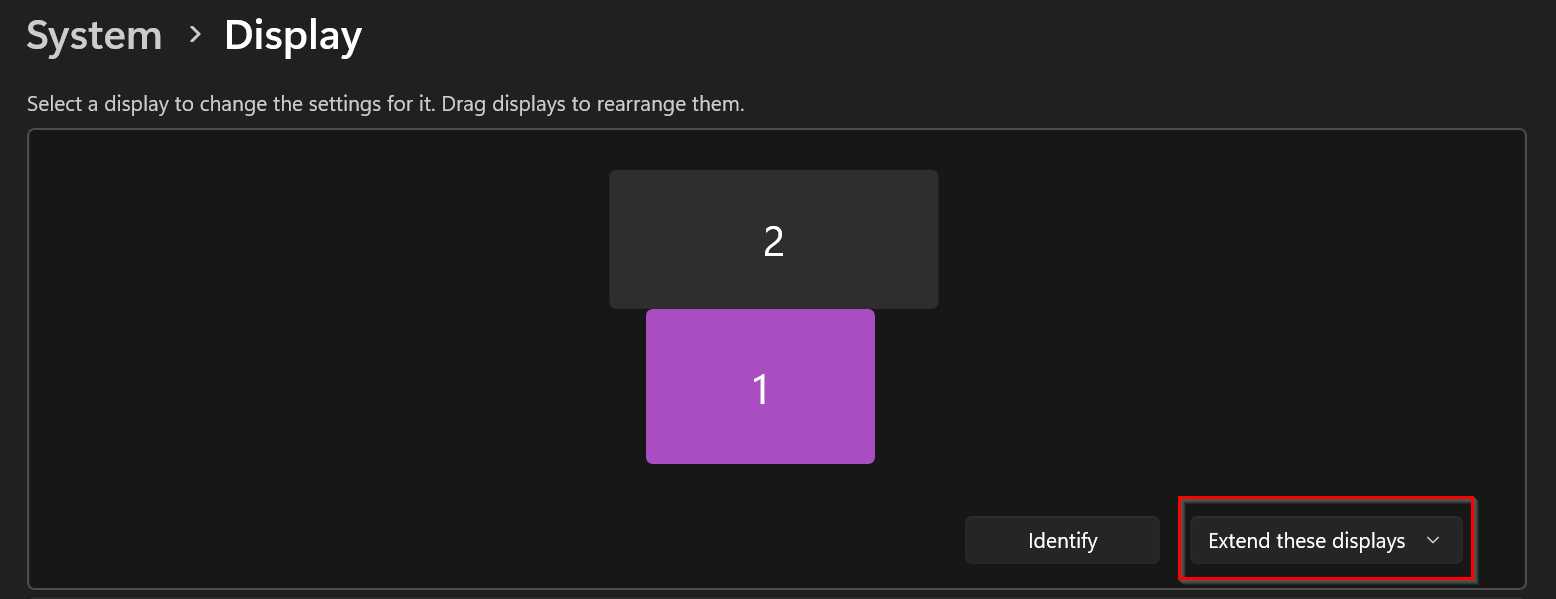
If the option is different, click on the dropdown box and select Extend these displays. Your computer screen will quickly turn black while the display is reconfiguring.
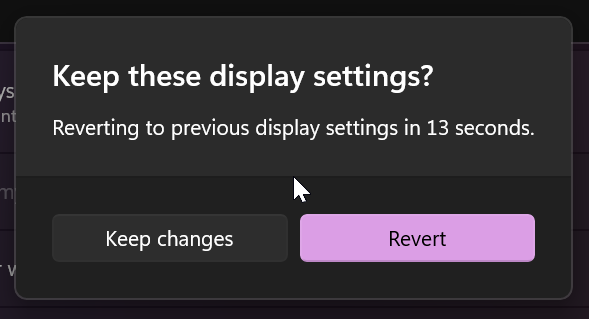
Confirm the changes quickly by selecting Keep changes or Revert from the pop-up window
Troubleshooting
When Windows detects another display, it should appear on the Display page. If you don't see it listed there, expand the Multiple displays dropdown, then locate Detect other display, then click the Detect button on the right.
Make sure the display is turned on and plugged into the correct video port on your computer. You may also need to select the correct source (i.e., HDMI, VGA, etc.) on the display itself to ensure that the display is using the correct video port. For more information, check the manual for your display or go to the manufacturer's website.
More information can be found at microsoft.com
Turning on Extended Desktop for macOS
With the Extended Desktop setting, your displays are treated as one continuous desktop.
- Make sure each display (screen) is properly connected and powered on.
- From the Apple menu, choose System Preferences.
- Navigate to the Displays menu and click the Arrangement tab.
- Disable (uncheck) "Mirror Displays."
Configuring the Displays
On the Arrangement tab, notice the blue boxes in the center of the screen. Each blue box represents a physical display that is currently connected to your computer. The size of each box is relative to the resolution of the display it represents. In the example image below, the larger box on the left represents an Apple 27" Thunderbolt Display, while the smaller box on the right represents the built-in display of a 13" MacBook Air (Color LCD).
The white bar at the top of a blue box represents the macOS menu bar that you always see at the top of a Mac device. Menu bar placement determines which display is treated as the primary display. In the example above, the external monitor is serving as the primary display, even though all the computer functions are coming from the Macbook. Typically, the primary display designation is purely based on user preference. To change your primary display, click and drag the white bar from one blue box to another.
You can also click and drag the blue boxes around to change a display's represented location to match their real-life location in relation to the other displays. For example, if the 27" Thunderbolt Display is physically located to the right of the MacBook, you will want to drag the bigger blue box to the right of the smaller box.